How to Set Up a Google Ads Account and Link it to an Agency
September 2024
If you want to run ads such as those on Google Search or YouTube, you will need a Google Ads account. You’ll be able to target your ads based on factors such as the desired age, location, and language of your target audience as well as their interests.
Before we walk you through the set up of a new Google Ads account and how you can give access to an agency that you’re working with to run your ads, it’s important that we address a commonly asked question:
Q: Can the agency create my Google Ads account for me?
The answer is generally no. This is because the agency would be using their Google account that’s tied to their business, not yours. This would mean that they’d own your account, so if you stop working with them, your account and everything gained in it would go with them. There’s also a higher security risk and you may be flagged for potential ad fraud when advertising since the advertiser and advertisements don’t align.
Now that we got that out of the way, let’s dive in.
What you need to create a Google Ads account
There are a few things that you should prepare before you start:
Google / Gmail account - This will be the account that becomes the owner of the Google Ad account, so setup should be done by someone with authority in your business.
Website, mobile app, YouTube channel and/or Google Business Profile - These are what the ads will be promoting.
Credit card - This is what Google will charge when taking payments for running the ads.
Step-by-step Instructions to Create a Google Ads account
1. Go to https://ads.google.com

Click on one of the blue “Start now” buttons.
Make sure you’re logged into the Google account that will own this Google Ads account.
Note: Google sometimes has offers for new advertisers to receive an ad credit if they spend a certain amount within a certain period. They can usually be found on this page and they’re worth checking out.
2. Begin setup.

Unfortunately, Google typically forces new accounts to create a campaign upon sign-up. You will cancel this campaign after it’s created, but you must create it.
First, double check to see that you’re logged into the correct Google account.
Enter your business name.
Choose the destination you’d hypothetically want people to go to from your ad (in most cases, it’s your website)
Click “Next”.
3. Link your accounts

Link the accounts that will be associated with this Google Ads account, such as a YouTube channel, Google Business Profile (Google Maps), etc.
You can skip this, but it’s easiest to get this out of the way now.
Click “Add” for each account and follow the instructions given.
Click “Next” when done linking.
4. Google Analytics linking
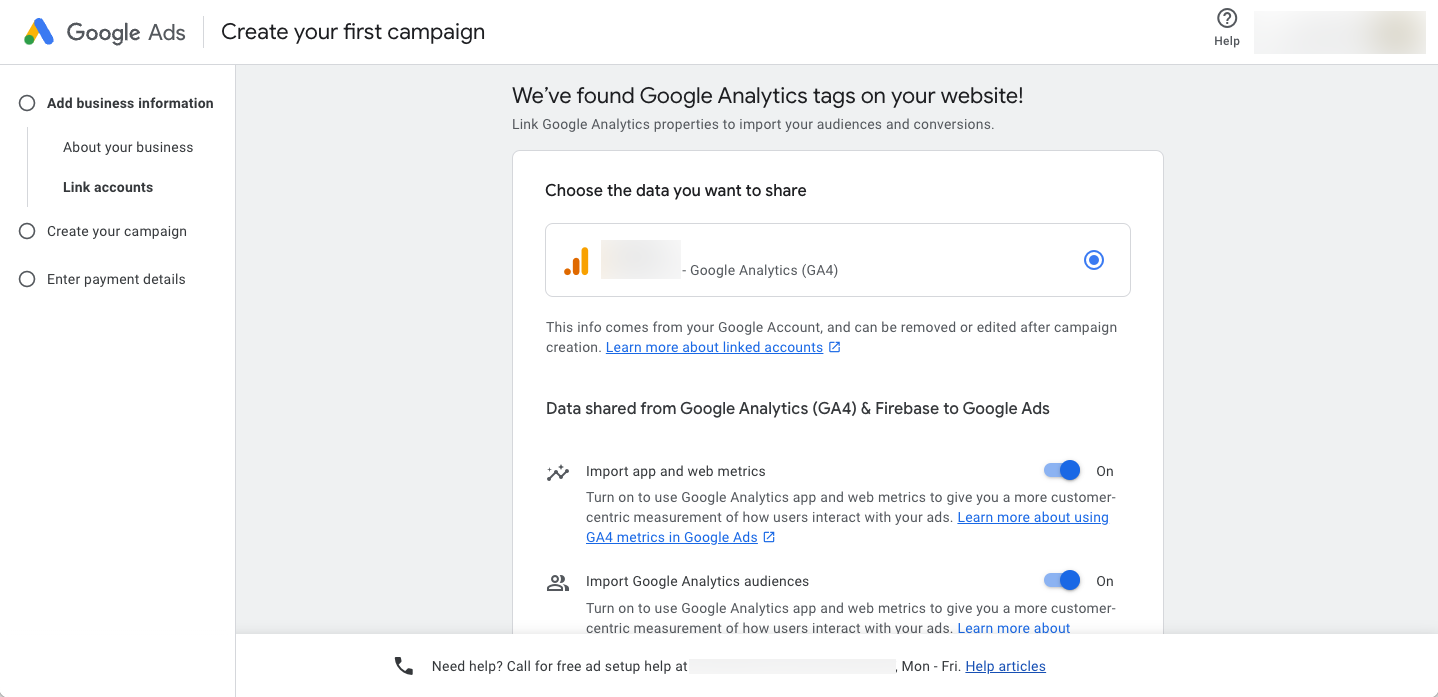
You may be informed that Google has detected Google Analytics tags in the website linked to your business.
It’s best to share the data since it will help with ad performance.
Make sure the buttons are on to enable linking and sharing existing data with the new ad account.
Click “Link Google Analytics”.
5. Create a new campaign: Goal

This is the start of creating the new ad campaign that Google forces you to do.
Since you will delete it immediately after creating it, the settings don’t really matter, so we’ll walk you through some easy settings.
Choose “Get more website sales or leads”.
Click “Next”.
6. Create a new campaign: Desired action
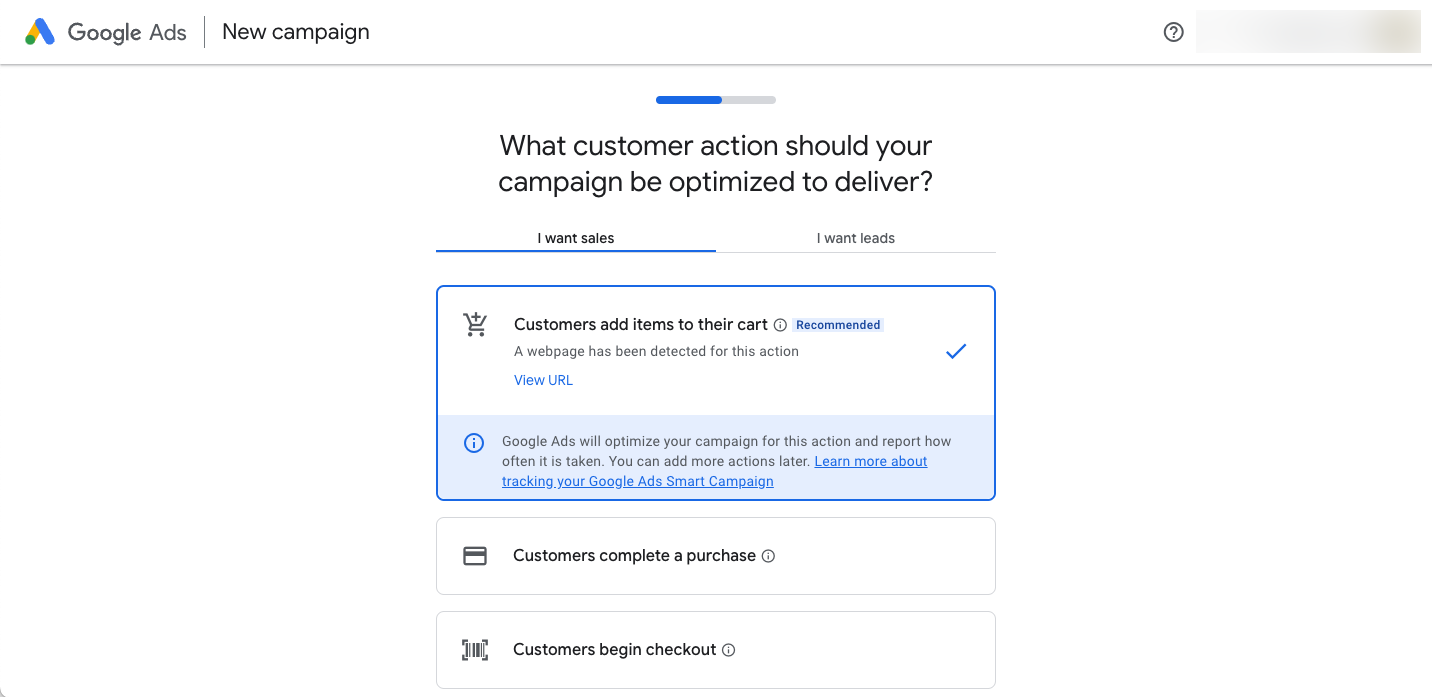
Choose an option like the one highlighted for you.
Click “Next” .
7. Create a new campaign: Ad creation

This is for a basic Google Search ad setup. Fill in the text boxes with any text you’d like.
This and the following steps in “New campaign” don’t really matter until payment registration since you won’t run the campaign.
Click “Next”.
8. Create a new campaign: Add images

You will be prompted to add images to make the ads better. If Google has some suggested images from your website, clicking them may be easier.
Click “+ Images”. You will be required to add “At least 1 square and landscape image”.
Click “+ Logos”. You will be required to add “At least logo”.
Click “Next”.
9. Create a new campaign: Targeting

Under “Selected terms” may be words that are meant to trigger your ad. If there’s none, write any word or phrase.
Set the “Advertise in” to 日本語 (Japanese) if you’d like. (We say this just because we help with marketing in Japan)
Click “Next”.
10. Create a new campaign: Location

This is regarding what locations your ad will show up in.
Change the location to “Japan” if you’d like.
Click “Next”.
11. Create a new campaign: Budget

Choose a suggested ad budget or click to enter your own.
Click “Next”.
12. Create a new campaign: Review

Click “Next”.
13. Create a new campaign: Payment Info

This is where you register the payment information of your Google Ads account. This is what Google will charge for you to buy the media for your paid ads.
Enter the information that is best for your company.
A “Payments profile” may already be suggested if there is already a payment method registered to your Google account.
Check whether or not you’d like personal guidance from Google.
Click “Submit”.
14. Create a new campaign: Finish

The ad campaign has been set up and sent for review.
Note: You now need to delete this campaign.
Click “Explore your campaign” and go to the ad management screen.
15. Delete the campaign

Here, you will delete the campaign that Google forced the setup for so that it doesn’t actually run.
In the left hand column, click “Campaigns”.
Click “Campaigns” in the submenu that comes up to the right.
Click the checkbox of your campaign.
Click “Edit” which is above the campaigns list. A menu will pop up.
In the pop-up menu, click “Remove”, then “Confirm”. You should see the campaign get deleted.
Congrats, your Google Ads account has been set up! Now it’s time to share it with your agency.
How to share your Google Ads account with an agency
If you have an agency or third party that will be creating ad campaigns and managing them for you, you need to provide them with access to your Google Ads account. Here’s how:

In the left hand column, click “Admin”.
Click “Access and security” in the submenu that comes up to the right.
Click the blue “+” icon under the “Users” tab.
Under the “Users” tab, insert the email address of the agency or third party.
Select the appropriate account access level.
Click “Send invitation”.
We hope this helps!